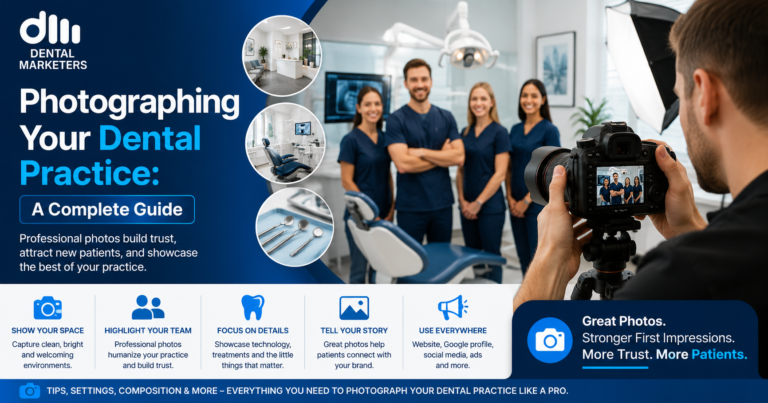
Dental practice photography means capturing clear, professional images of your office, your team, and your patient results. Good photos build trust, show your work, and help new patients choose your practice. Every dental office needs a mix of marketing shots and clinical before and after photos.
Great photos tell your practice’s story. They show patients what to expect before they walk in. Photographing your dental office the right way builds trust fast. It also supports your website, your social media, and your patient records. This guide shows you how to do it well.
What Is Dental Practice Photography?
Dental practice photography is the process of capturing images of your office, your team, and your dental work. It covers marketing photos for your website and clinical shots like dental before and after photos. Both types help you attract patients and track treatment results.
Why Dental Practice Photography Matters
Patients judge a dental office before they ever sit in the chair. So, strong photos help you make a great first impression online. Photos also build trust because people want to see real results, not stock images.
Here is why photographing your dental office should be a priority:
- It builds trust. Clear, honest photos show patients you have nothing to hide.
- It shows your results. Dental before and after photos prove your treatments work.
- It supports your marketing. Great images make your website and social pages stand out.
- It helps your team. Photos of your staff make your practice feel warm and welcoming.
- It protects your records. Clinical photos document a patient’s progress over time.
Additionally, photos help your practice compete online. Most patients search for a dentist before they call one. As a result, your photos often make the first impression, not your website copy.
Meanwhile, good photos help your team too. Clear before and after photos give your staff an easy way to explain treatments. They also help you track a patient’s progress over time. In short, strong photos help your marketing and your patient care.
How to Photograph Your Dental Office: Step-by-Step Guide
Follow these steps to plan and capture strong photos for your practice.
Step 1: Plan your shot list first. Before you pick up a camera, list every photo you need. Include your office, your team, and your equipment. A clear plan saves time and avoids missed shots.
Step 2: Clean and prep your space. Next, tidy every room you plan to photograph. Clear counters, straighten chairs, and remove clutter. A clean space always photographs better than a messy one.
Step 3: Use good lighting. Natural light works best for most office and team photos. However, intraoral and clinical shots need a ring flash or off-camera flash for even light. Good lighting removes shadows and shows true detail.
Step 4: Choose the right equipment. A DSLR or mirrorless camera gives you the sharpest results. For clinical shots, use a macro lens. It captures fine detail up close. For office and team shots, a standard zoom lens works well. Also, keep a few extra tools on hand. Retractors, small mirrors, and a plain backdrop all help. These small tools make a big difference in your photos.
Step 5: Photograph your team with care. Take small group shots instead of full staff photos. Staff change over time, so smaller groups keep your photos useful longer. Also, get individual portraits for team bio pages.
Step 6: Capture your before and after shots consistently. Use the same angle, distance, and lighting for every before and after photo. Consistency makes your results easy to compare and easy to trust.
Step 7: Get patient consent every time. Always ask for written consent before you photograph a patient. This step protects your practice and respects patient privacy. Keep a signed copy of every consent form in your patient records. Then, store your photos in a secure, protected system, not on a personal phone or shared drive.
Step 8: Edit lightly and honestly. Adjust brightness and color balance only. Avoid heavy editing that changes the true look of your work. Honest photos build long-term trust.
Key Types of Photos Every Dental Practice Needs
Every dental office benefits from a full mix of photo types. Here are the essential categories to cover:
- Hero images: Wide shots of your office or team for your homepage.
- Action shots: Candid photos of your team talking with patients.
- Exterior shots: Photos of your building so patients recognize it in person.
- Interior shots: Images of your waiting room, operatories, and hallways.
- Technology shots: Photos of your equipment, like digital X-ray or scanning tools.
- Detail shots: Close-ups of unique design features in your office.
- Team shots: Small group and individual photos of your staff.
- Before and after photos: Clear, consistent images that show treatment results.
Together, these photo types give your practice a full, professional look. You will have images ready for your website and your social pages. So, you won’t need a new photo shoot every time you want fresh content.
Dental Before and After Photos: Best Practices
Dental before and after photos are some of the most powerful marketing tools you have. Still, they only work well when done right.
- Keep the angle identical. Use the same camera position for both shots.
- Match the lighting. Use the same light source and setting each time.
- Use a plain background. A simple backdrop keeps focus on the teeth.
- Get consent in writing. Always confirm the patient agrees to share their photos.
- Store images securely. Keep clinical photos in a protected patient record system.
When you follow these steps, your before and after photos become proof, not just pictures.
Frequently Asked Questions
What equipment do I need for dental practice photography?
You need a DSLR or mirrorless camera, a macro lens for clinical shots, and a ring flash for even lighting. A standard lens works fine for office and team photos.
How often should I update my dental office photos?
Update your photos once a year, or sooner if you renovate, hire new staff, or add new equipment.
Can I use my phone to photograph my dental office?
Yes, a modern smartphone can capture good marketing photos in strong natural light. However, clinical photos still need a proper camera and macro lens for accuracy.
Do I need patient consent for before and after photos?
Yes, always get written consent before you use any patient photo for marketing or clinical records.
What is the best background for dental photos?
A plain, neutral background works best. It keeps the focus on your team, your office, or your patient results.
Should I hire a professional photographer for my dental practice?
A professional photographer can help, especially for hero images and team portraits. However, with the right camera and a clear plan, many practices capture strong photos in-house too.
Ready to Elevate Your Dental Practice Photos?
Great photos do not happen by accident. They come from a clear plan, the right equipment, and steady support. That is where Dental Marketers comes in.
Dental Marketers helps UK dental practices build a complete visual strategy. We plan your shot list, guide your team through the process, and turn your photos into content that attracts new patients. From your website to your social media, we make sure every image works hard for your practice.
Ready to see your dental practice looking its best? Get in touch with Dental Marketers today. Let’s build a photo plan that brings in new patients. Maybe you need a full photo shoot plan. Maybe you need help training your team. Maybe you just need fresh before and after photos for your website. Our team is ready to help, every step of the way.
Keep Learning: Related Resources
Photos are just one part of a strong dental marketing plan. To build your online presence further, check out these guides:
Video content works alongside photography to show your practice in motion. Learn more in this guide to dental videography and content creation.
Once you have great photos, share them where patients are looking. This guide on Instagram for dentists shows you how to build a strong presence in 2026.
Your team photos deserve a great home too. Learn how to pair them with short clips in this guide to dental team videos for your practice team page.
Written by: Dental Marketers Content Team, Dental Marketing Specialists
Last updated: July 2026